
Today I wanted to show you the working process of the fireplace.

First I cut the wood in the size I needed for the fireplace "box".

Then I took some clay that dries at the air...

... and of course I was interrupted. So I put a wet paper towel on the clay.

Half an hour later I could still roll it without problems.


Then I turned it around and rolled it to the other side.

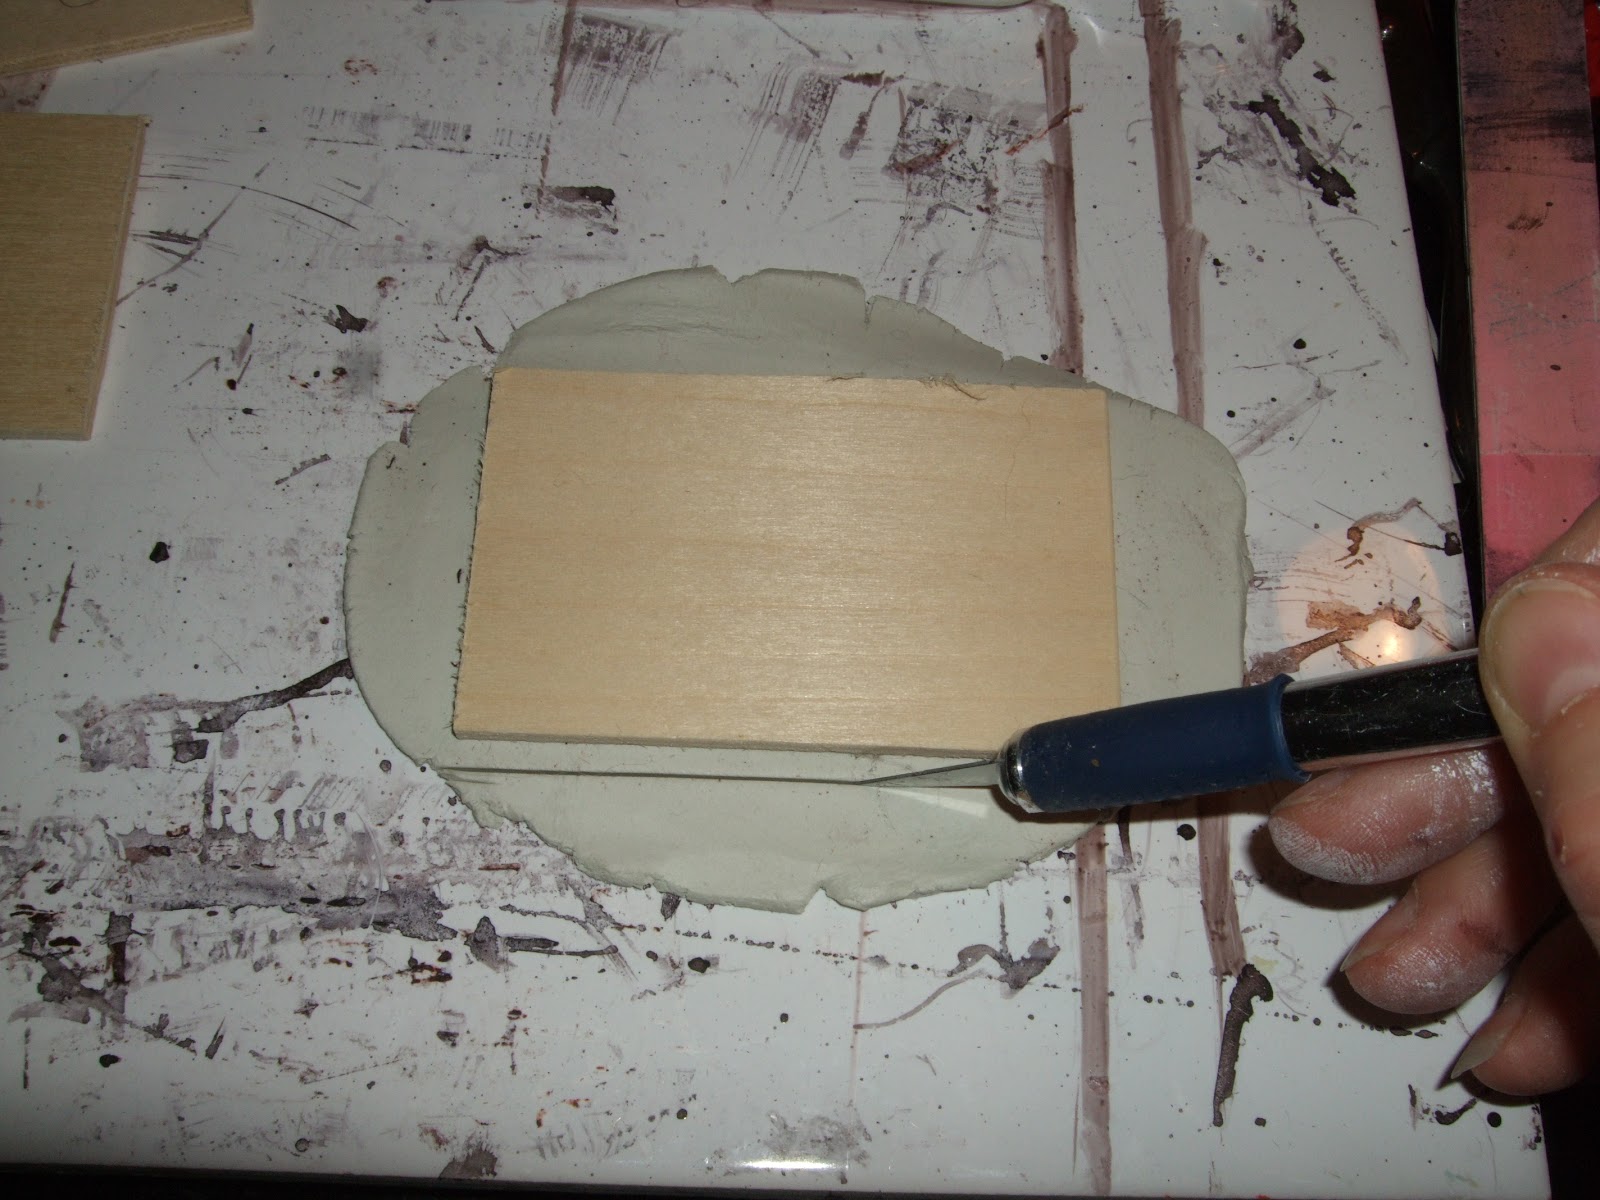
When the size was right for my wooden "pattern" I cut it along the edge,
but left a little bit protude, because the clay shrinks a
little bit when drying.

With the help of a straight tool, I carved horizontal lines into the clay...

... and then the vertical lines. Don't be too meticulous with these lines, when it comes to straightness.
The bricks of old fireplaces are not even.

Because I needed one straight bottom line and a right angle, I made these with the help of Lego bricks. They are great for so many things!

Now I let it dry overnight. One VERY IMPORTANT thing is, that you have to strip them carefully from the tile (or whatever you use) before letting it dry. Otherwise you can't take them off, without damage.
Then I painted the clay with highly pigmented watercolours (I love Windsor & Newton and Schmincke).

Then I assembled the walls with the help of my wooden "pattern", and left a few tiny holes at the bottom for the wires. The fire will be very special and I'll need some time.... I hope I can show you a video this month.

Have a wonderful day


feliz navidad!
ReplyDelete